First of all, I start with a kit. I have found a treasure of a quilt shop in the basement of a woman's home. She sells fabric for very little over cost and she makes kits so that most of the cutting is done for me. It cuts down on waste and saves a lot of time. So, in this particular kit, the back and the batting are cut and then it is a "quilt as you go" process. It is fun. If you are interested in trying one after you see the process, let me know and I can give you the information on how to get a kit.
Step one: This is the back and the batting. I start by folding the fabric in half end to end and pressing it so make a straight line crease.
 |
| Press for making a crease to sew the first line. |
Once is it creased, it can be sewn on the line. So, you are sewing across the width of the fabric to divide the piece in half.
Now, I fold the fabric in half lengthwise and make a crease down the length of the fabric. I find that folding and creasing helps me keep my sewing line straighter. It isn't perfectly straight, but better than just trying to eyeball it.
When these first two lines are sewn, you have the starting point for the actual design. The picture here shows those lines.
 |
| This is the front side of the project which is the batting side. This is where the first piece of the design goes. |
The square piece is the starter. It is placed diagonally on the batting side (front) and I only pinned it in place to stabilize it until I started adding the pieces.
The kit comes with all of the pieces cut to size. I am grateful for the convenience of the kit as it saves a ton of time not having to cut these strips. The strips are put into place lightest to darkest. In this kit, that was challenging because these colors are pretty much all on the darker side (Thankfully, they aren't on the Dark Side though).
Now, the progress really begins. On my first one, I had such trouble figuring out the mathematical factor and nearly had to have Jim help me figure it out. But, persistence prevailed and I was able to actually get it on my own.
Here you start by attaching the shorter of the first set of strips the the square.
To the sewing machine. Stitch those two in place as you can see in the photo. (Those hands of mine remind me of my mom, I think I have her hands and my age shows in my hands for sure!)
When you get the shorter of the pieces on, press them open. Then add the longer of them as shown below. The instructions draw out the whole layout and have the pieces numbered. 

Once again you stitch the next two pieces on to form the design.

Press after sewing each set of two on.
 |
| The back of the runner starts to show the quilting. Thankfully, this side won't be visible because with this white background, you can see the imperfections quite easily. |
Continue adding the pieces following the same steps as the start.
Then, of course, in this house, there is always someone wishing to help--or was she just making sure it wasn't a place for her to snuggle up?
As you add, you see the shape coming more and more together.
Once someone said, "As you sew, so shall you rip." This is the story of my life. But, this time, I only had to take out a few stitches because of my machine being a bit problematic. Usually, I have to take out a seam or two, so this time I was happy to get by with only three stitches. It would not have been a sewing project of mine without seeing this handy little tool put to use.
All of the pieces are in place and now we are ready to trim this out.
The red strips are placed along the edge of the main design. Can I just say, it is really a good idea to know the difference between 1-1/2 inches and 2-1/2 inches? Reason being, I used the wrong strips here. But, thankfully, I was able to go to my reliable fabric shop and get some other fabric to replace my oops.
So, attach the strips the length of the runner.
Then add the pieces to follow the angle at the end of the runner.
Next add the next boarder piece the same way.
Once all of the boarders are in place, it is time to cut the excess fabric off and do the binding.
You cut off the excess following the design of the runner.
I really like my rotary cutter. I also inherited that clear plastic ruler from my mom's things. It is a life saver. It allows the blade to ride against it and keeps the lines clean.
All trimmed and ready for the binding.

Let the binding begin. It is necessary to sew the strips together to make the binding. So, when you do this, you have one long piece of fabric. I am getting better at the geometry of this, but when I get stuck, I go to Youtube and find a video to remind me how to do it. I find there is a video for nearly everything...well, everything I want to do, I haven't looked to see if there is one on how to clean house. Maybe that will come at another time.
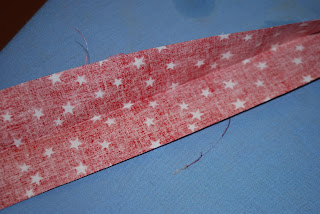
Once you sew the strips together, you get this angle seam and then cut off the excess. Press the seams open.
Fold the fabric in half lengthwise and press.
Now the binding is ready to attach to the runner.
There are two ways to do this, I choose the hand sewn method because I like the look better.
 |
| I attach the binding raw sides together and pin it in place leaving enough length to be able to attach the ends at the finish. |
There are several ways to do this step too, depending upon which method you find easiest. I saw this one on a couple of videos so I did it this way on this one. It requires that you leave about 8 inches unstitched on each end when you attach the binding and then attach them on an angle so you really can't tell where your binding began and ended. Believe me, this was the most difficult part of the project, but it was the first time I did it this way too. Maybe next time I will find it a bit easier. It really is all about the math.
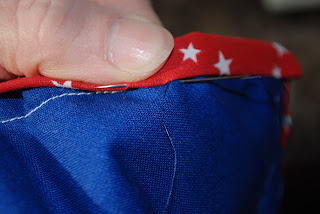
Now, since I sewed the binding on the front by machine, it allows me to have a very clear marking as to where to hand stitch on the back. This uses the same stitch as hemming. Hemming, when will I get any of that done that I need to do?
The project is finished.
Thanks for reading.


